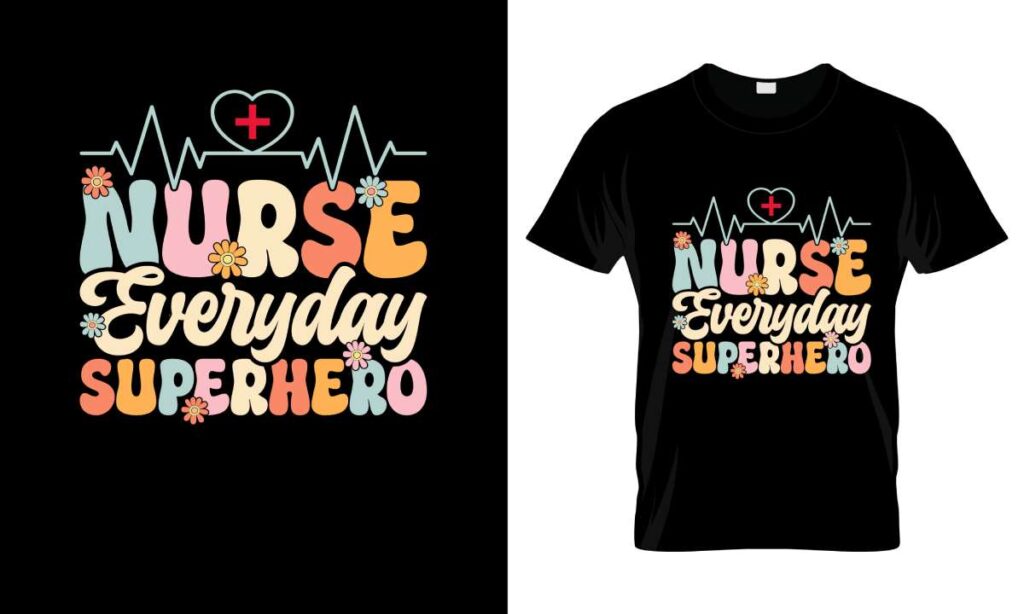
DTF transfers have exploded in popularity among hobbyists and small shops, delivering vibrant, durable prints on a wide range of fabrics, from cotton tees to blends and even some performance materials. For those just starting out, this beginner’s guide to DTF printing explains the basics and helps you choose a reliable method that balances forgiveness for beginners with scalability as you gain experience, all while laying groundwork for future, more ambitious projects. Curious how DTF transfers work, you’ll learn a simple workflow: printing designs onto PET film, applying an adhesive powder, curing, and then transferring with heat to fabric, followed by a cool-down period to maximize bonding and minimize ghosting. Following solid DTF transfer guidelines helps ensure color fidelity; it also supports DTF printing durability, keeping prints vibrant through wash cycles, while safe-handling practices and proper curing reduce surface residue and improve long-term wear. When you compare DTF vs other transfers, you’ll see that it offers broad fabric compatibility and strong durability, making it a compelling option for solo crafters and small studios seeking flexible production, strong color, and easy misalignment tolerance, and it scales well for seasonal promotions and micro-run products as your business grows and expands online globally.
In broader terms, the DTF process is a color-rich garment decoration method that uses a PET film, pigment inks, and a separate adhesive powder to bond designs to fabrics. You might hear it described as a digital transfer film, adhesive-backed prints, or heat-press application—the core concept remains the same: a printed image is prepared on a carrier and fused to fabric via heat. This approach excels on cotton and blends, offering sharp detail and vivid color with durability dependent on proper curing, clean equipment, and consistent heat and pressure. For hobbyists and small shops, the method provides flexibility for small runs, complex multicolor artwork, and quick turnaround, making it competitive with other techniques in the DIY marketplace.
How DTF Transfers Work: From Design to Fabric
If you’re curious how DTF transfers work, the basic flow starts with a design printed onto a PET film using CMYK inks. A separate layer of adhesive powder is evenly distributed over the wet ink, then heated to cure the powder so it sticks to the film. The result is a bondable sheet that can be placed on fabric and pressed to transfer the ink from the film to the garment.
During transfer, the heat press applies controlled heat and pressure, and after cooling the film is peeled away, leaving a vivid, durable print fused to the fabric. This core concept—printing on film, powder bonding, and heat activation—drives both beginner-friendly workflows and the potential for complex, multi-color artwork with sharp edges.
DTF Printing Durability: Building Long-Lasting Garments
DTF printing durability hinges on several factors, including ink quality, the adhesive powder, proper curing, and post-transfer care. When these elements are executed correctly, DTF transfers resist washing and normal wear surprisingly well on cotton, poly-cotton blends, and many synthetics.
To maximize longevity, turn garments inside-out before washing, use cold or warm water, avoid harsh detergents, and minimize high-heat drying. Following brand-specific care guidelines and allowing a full cure time after transfer helps prevent cracking, edge peeling, or color fading over time.
DTF Transfer Guidelines: Best Practices for Consistency
DTF transfer guidelines help you stay consistent across projects: use high-quality inks, PET film, and adhesive powder designed for DTF, fully cure the powder before pressing, and test on a fabric sample first. Adhering to these guidelines reduces surprises and keeps color, opacity, and adhesion stable.
Additionally, maintain clean equipment, calibrate your heat press for even temperature and pressure, and document your process so you can reproduce the same result on future runs. Consistency is especially important for multi-color designs where misregistration can ruin the artwork.
DTF vs Other Transfers: Pros, Cons, and Use Cases
DTF vs other transfers highlights how this method stacks up against alternatives. When used correctly, DTF generally offers broad fabric compatibility, strong color fidelity on dark fabrics, and suitability for small batches without creating separate color layers.
When you compare to sublimation, screen printing, or DTG, you’ll find different sweet spots: sublimation favors polymer-coated or light fabrics; screen printing shines on large runs of solid color; DTG can deliver ultra-fine details on direct prints but may be costlier for small orders. DTF provides a flexible middle ground for many shops.
Beginner’s Guide to DTF Printing: Your Path to Simple, Colorful Transfers
If you’re following a beginner’s guide to DTF printing, start by learning the overall workflow and the hardware and materials involved, including a standard inkjet printer adapted for CMYK films, PET film, adhesive powder, and a heat press. This overview helps demystify what you’ll need to get started.
Begin by choosing simple designs, printing test swatches on fabrics similar to your target garments, and building a small, reliable material set. This approach mirrors practical steps in the beginner’s guide to DTF printing, setting you up for steady progress as you tackle more complex graphics.
Common Mistakes and Fixes in DTF Transfers
Even with careful prep, powder clumping, incomplete curing, misregistration, and under- or over-pressing are common issues when starting with DTF transfers. Recognizing these pitfalls early helps you troubleshoot before large runs.
Fixes include using fresh powder and films, calibrating the heat press, applying even powder coverage, and conducting test transfers on scrap fabric to dial in time and temperature. By iterating on small tests, you’ll minimize waste and improve overall transfer quality.
Frequently Asked Questions
How DTF transfers work and what makes them different from other heat-transfer methods?
DTF transfers work by printing a design onto a PET film using CMYK inks, then applying an adhesive powder while the ink is still tacky. The powder is cured to create a bondable sheet that transfers to fabric with heat and pressure. This method offers vibrant color, fine detail, and strong adhesion across many fabrics (including cotton and blends), making it a versatile choice for beginners and pros.
DTF printing durability: how durable are DTF transfers after washing, and what care is recommended?
DTF printing durability is high when the transfer is properly cured and cared for. Key factors include ink and powder quality, correct curing, and following care guidelines: turn garments inside-out, wash in cold or warm water, use gentle detergents, and minimize high-heat drying. With proper care, DTF transfers maintain color fidelity and adhesion through many washes.
DTF transfer guidelines: what are the essential steps and materials for reliable results?
DTF transfer guidelines start with quality materials: good DTF inks, PET film, and adhesive powder, plus a reliable heat press. Ensure the powder cures fully before pressing, test on similar fabrics, and maintain consistent heat and pressure. Accurate alignment, clean equipment, and a proper cooldown period further improve reliability and longevity.
DTF vs other transfers: in what scenarios is DTF preferred over sublimation, DTG, or screen printing?
DTF versus other transfers: DTF excels on a wide range of fabrics, including cotton, with strong color fidelity on dark fabrics and flexibility for small runs. Sublimation works best on polymer-coated or light-colored substrates, while screen printing is cost-effective for large runs but less flexible for complex designs. DTG can yield very detailed prints, but DTF often offers better durability and broader fabric compatibility for small businesses.
Beginner’s guide to DTF printing: what starter kit do I need and what basic workflow should I follow?
Beginner’s guide to DTF printing: assemble a starter kit with a DTF-capable printer and CMYK inks, PET film, adhesive powder, and a heat press. Your workflow includes designing, printing onto PET film, applying and curing the adhesive powder, prepping the garment, transferring with heat and pressure, and performing a final cooldown or cure as recommended. Start with simple designs to build confidence and gradually tackle more complex, multi-color artwork.
DTF transfer guidelines: what are the common mistakes beginners make and how can you avoid them?
Common mistakes include powder clumping, incomplete curing, misregistration, and under-pressing. Avoid them by using fresh powders and films, calibrating your heat press for accurate temperature and pressure, and performing test prints on scrap fabrics before final runs. Following these guidelines helps ensure consistent, durable DTF transfers with sharp edges and vibrant color.
| Topic | Key Points |
|---|---|
| What are DTF transfers and why they matter | – DTF transfers are a heat-transfer method that prints designs onto PET film and transfers them to fabric using a heat press. – They use a powder adhesive that bonds ink to the garment, enabling strong adhesion on cotton, blends, and some synthetics. – They allow reproducing complex, full-color graphics with high detail and durability through washing when properly cured. |
| How DTF transfers work (the core idea) | – Print design onto PET film with water-based or pigment inks. – Distribute adhesive powder over the wet ink and heat to cure. – Place on fabric and apply heat/ pressure to transfer; peel away after cooling to leave a vivid print fused to the fabric. |
| Key advantages for beginners and pros | – Vibrant color replication and high detail for complex designs. – Wide fabric compatibility (cotton, blends, some synthetics). – Forgiving workflow with tolerances for misalignment and moderate press times. – Durable results when properly cured and cared for. |
| The materials you’ll encounter | – Printer and CMYK inks (often converted for DTF) – PET film – Adhesive powder – Hot-melt adhesive curing equipment – Heat press |
| A practical note on design and preparation | – Consider fabric color/texture; dark fabrics may need underbase for opacity. – Plan print resolution, color separations, margins/bleeds. – Well-prepared designs yield crisper edges and richer color with DTF. |
| Step-by-step: how to execute DTF transfers (a practical workflow) | – Create/finalize design with sharp lines. – Print onto PET film with appropriate CMYK inks. – Apply adhesive powder on the wet ink. – Cure the powder. – Prepare the garment (clean, wrinkle-free, pre-press). – Transfer with heat/pressure. – Peel the film (hot or cold per product). – Final cure or cooldown if advised. |
| Tips to optimize your DTF transfer results | – Run tests on scrap fabric to gauge color and opacity. – Ensure even adhesive coverage. – Control moisture in fabrics. – Align carefully to reduce misregistration. – Calibrate heat press temperature and pressure. – Store powders/films in dry, cool conditions. |
| Durability and care: making DTF prints last | – Durability improves with proper ink/powder quality and curing. – Turn garments inside-out before washing. – Use cold/warm water, mild detergents. – Limit tumble drying or air-dry. – Follow transfer supplier care guidelines. |
| DTF transfers vs other transfers: where it shines | – DTF vs sublimation: broader fabric compatibility (incl. cotton) and better color fidelity on dark fabrics. – DTF vs screen printing: more flexible for small runs and intricate designs. – DTF vs DTG: strong durability on diverse fabrics and often lower per-unit cost for small catalogs. |
| DTF transfer guidelines for best results | – Use high-quality inks, films, and powders designed for DTF. – Ensure full cure of powder before pressing. – Verify fabric suitability; test when needed. – Maintain clean equipment and consistent heat/pressure. – Allow a cool-down period if recommended. |
| Common mistakes and how to avoid them | – Powder clumping, incomplete curing, misregistration, insufficient heat/pressure. – Use fresh materials, calibrate the press, practice on garments, and follow manufacturer times. |
| Putting it all together: a beginner’s path to mastery | – Start simple designs, invest in key materials/equipment, and build a practice routine. – Gradually adjust heat, pressure, and curing based on fabric type and print complexity. – Expect consistently vibrant, durable prints as you scale. |
Summary
Conclusion